The Physicks editor is a fullscreen interface designed to give you total control over your composition without leaving WordPress. This guide walks you through every panel, button, and option.
Opening the editor
The editor opens automatically when you:
- Create a new composition from Physicks → Add New.
- Click Edit on any existing composition from Physicks → Compositions.
The editor replaces the standard WordPress edit screen, taking up the full browser window.
Layout overview
1
Top toolbar
2
Canvas
3
Right sidebar
4
Bottom panel
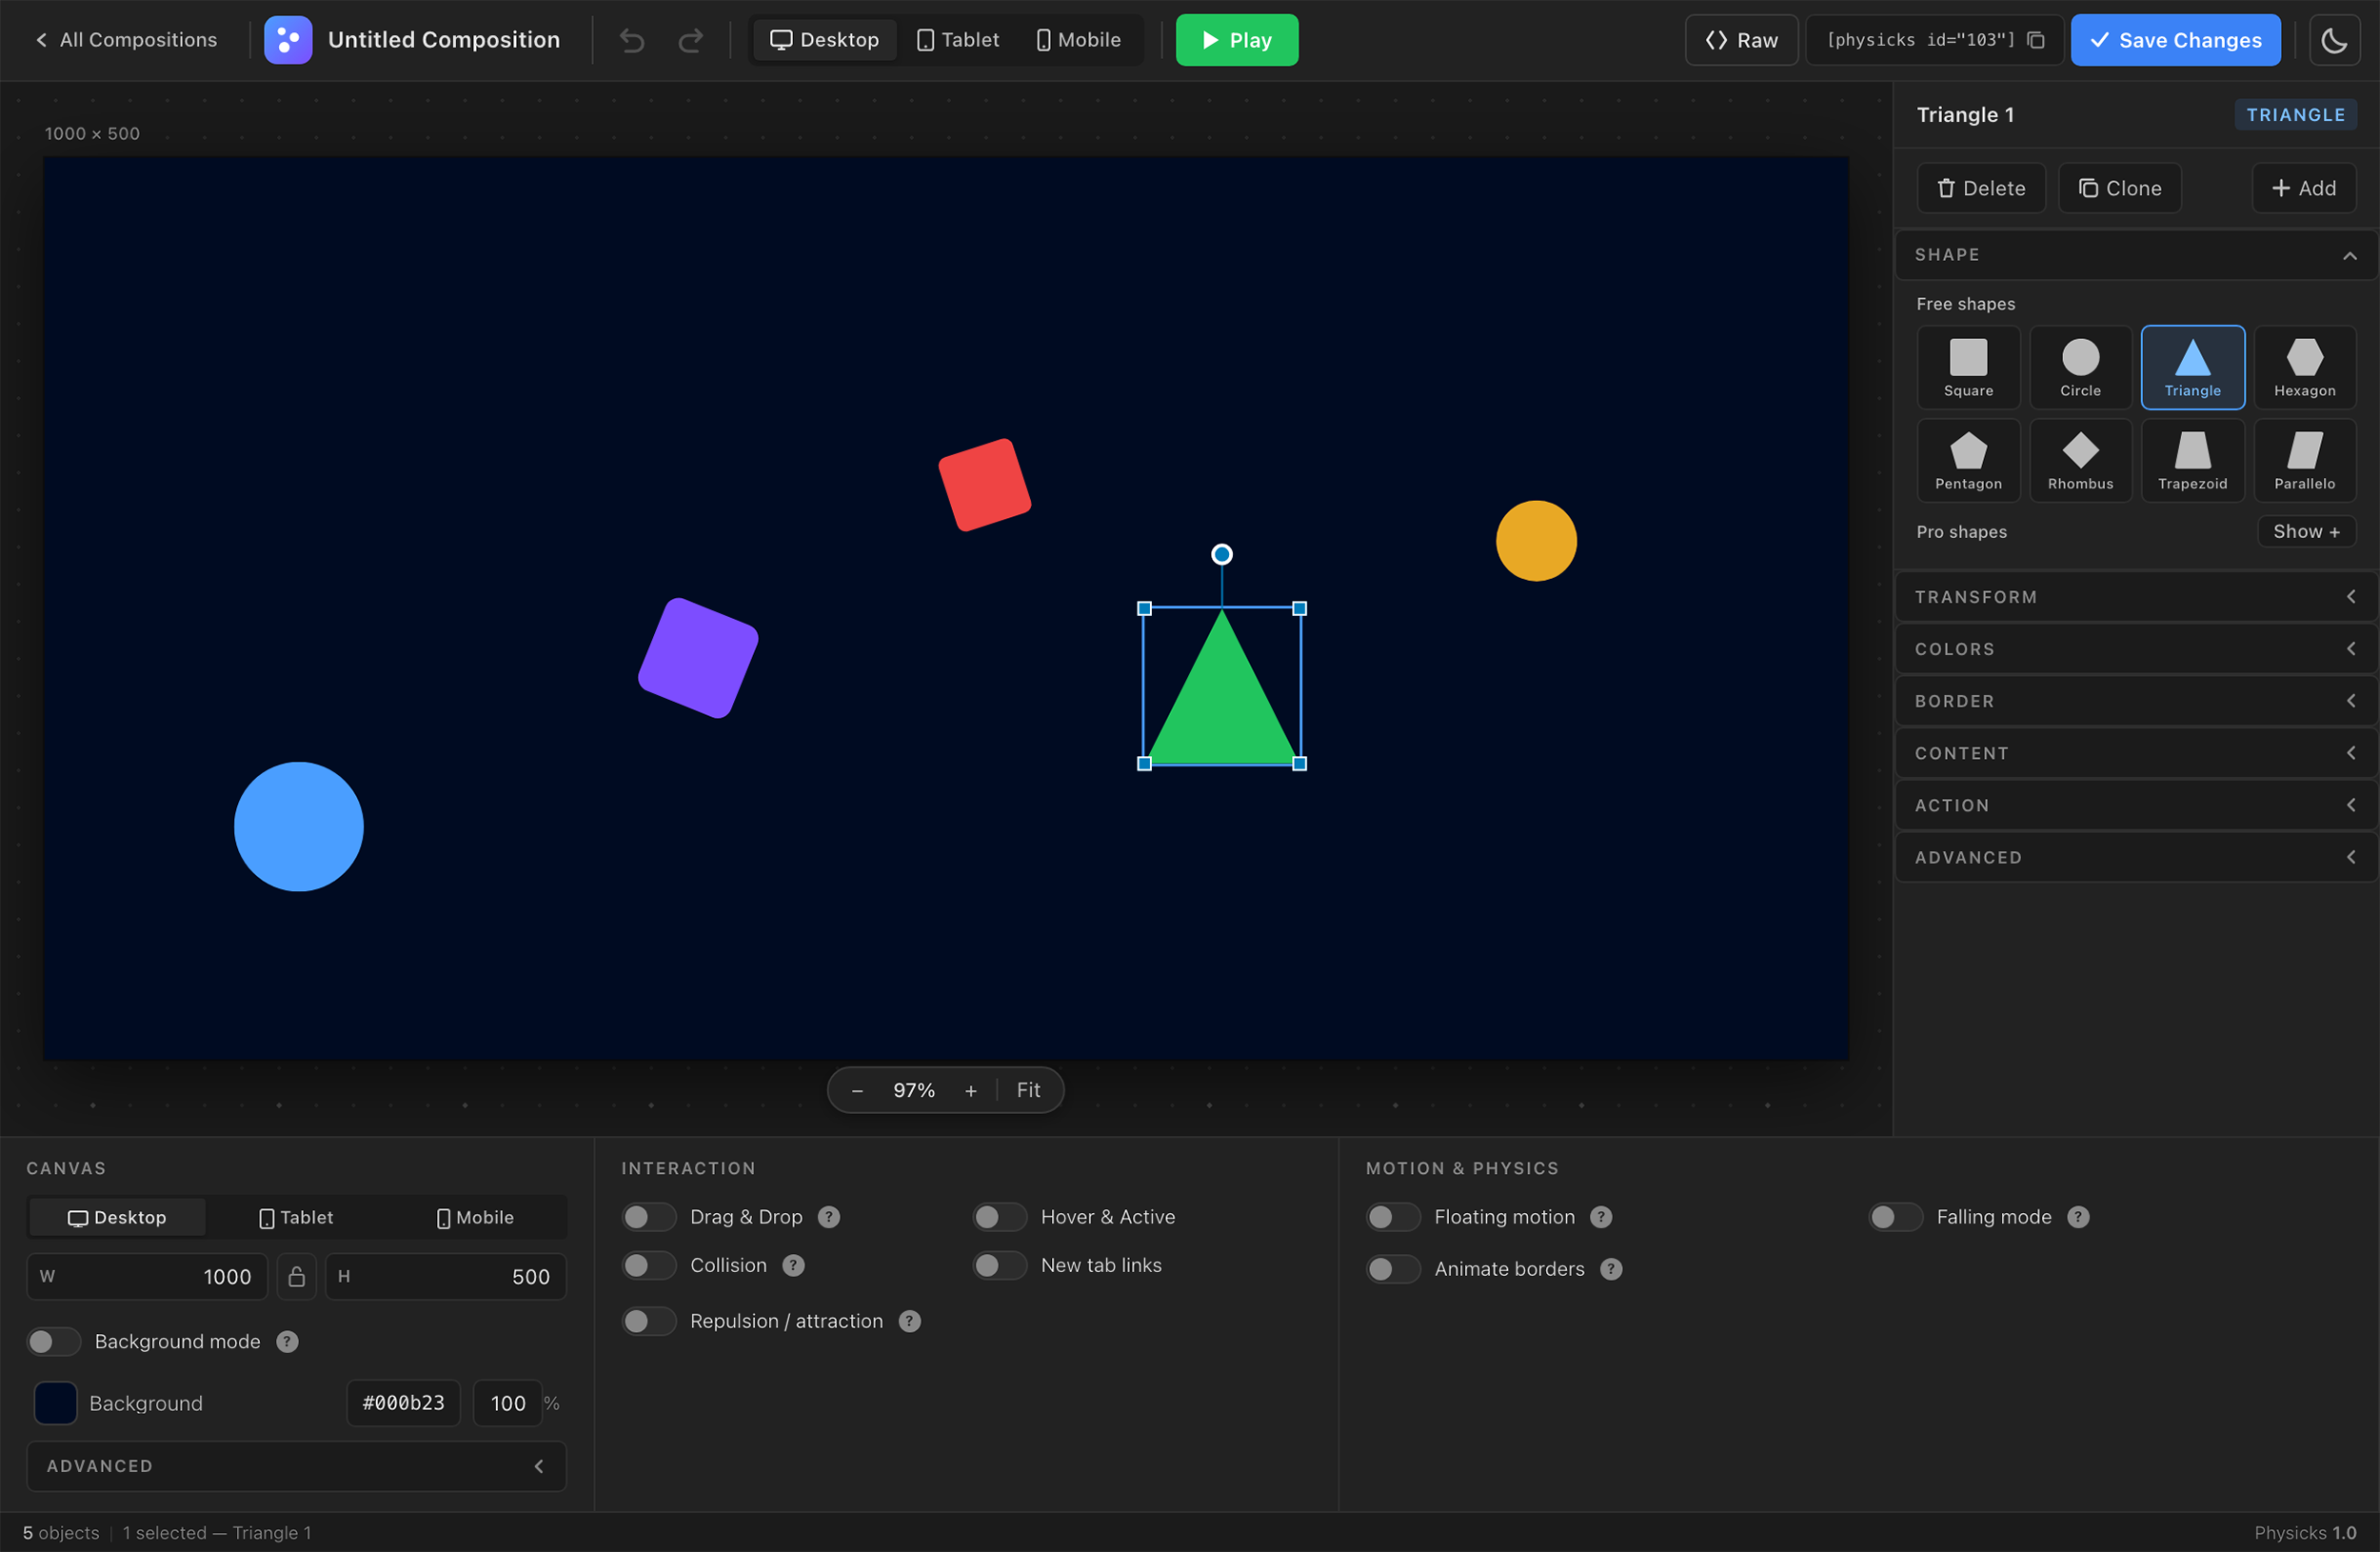
The editor is divided into four main areas:
- Top toolbar — global actions (save, play, view modes, undo/redo).
- Canvas — the central work area where you compose your scene.
- Right sidebar — properties of the currently selected object.
- Bottom panel — composition-wide settings (canvas, interaction, motion & physics).
When no object is selected, the right sidebar is empty. When an object is selected, the sidebar displays its full set of properties.
Top toolbar

Left to right: composition title — add object (+) — undo/redo — Desktop/Tablet/Mobile toggle — Play/Stop — Raw JSON — Save
The top toolbar contains the actions that affect the entire composition.
Composition title
Click on the title to rename your composition. Changes save automatically when you click outside the field.
Add object
Click the + button to insert a new object at the center of the canvas. The new object inherits the default properties configured in Physicks → Settings → Default Settings → Object.
Undo / Redo
Every action you take — moving an object, changing a color, adjusting a slider — is recorded in the history. Use the undo/redo buttons or keyboard shortcuts (Cmd+Z / Ctrl+Z for undo, Cmd+Shift+Z / Ctrl+Shift+Z for redo) to step backwards and forwards.
View toggle (Desktop / Tablet / Mobile)
Switch between the three responsive breakpoints to design separate layouts for each. Anything you change while in Tablet or Mobile view is stored as an override on top of the Desktop base. Learn more in the Responsive Design guide.
Play / Stop
Click Play to activate the physics engine inside the editor. Objects start falling, bouncing, or floating based on your current settings, exactly as they will on the frontend. Click Stop to pause and return objects to their original positions.
This is the fastest way to preview your composition without leaving the editor or saving.
Raw
Opens a panel with the raw JSON data of the composition. Useful for:
- Copying an entire composition to paste into another site.
- Manually editing values that aren’t exposed in the UI.
- Debugging unexpected behavior.
Be careful when editing raw JSON — invalid syntax will prevent the composition from saving.
Save
Saves your composition to the WordPress database. The shortcode of the composition appears next to the title once saved.
The canvas
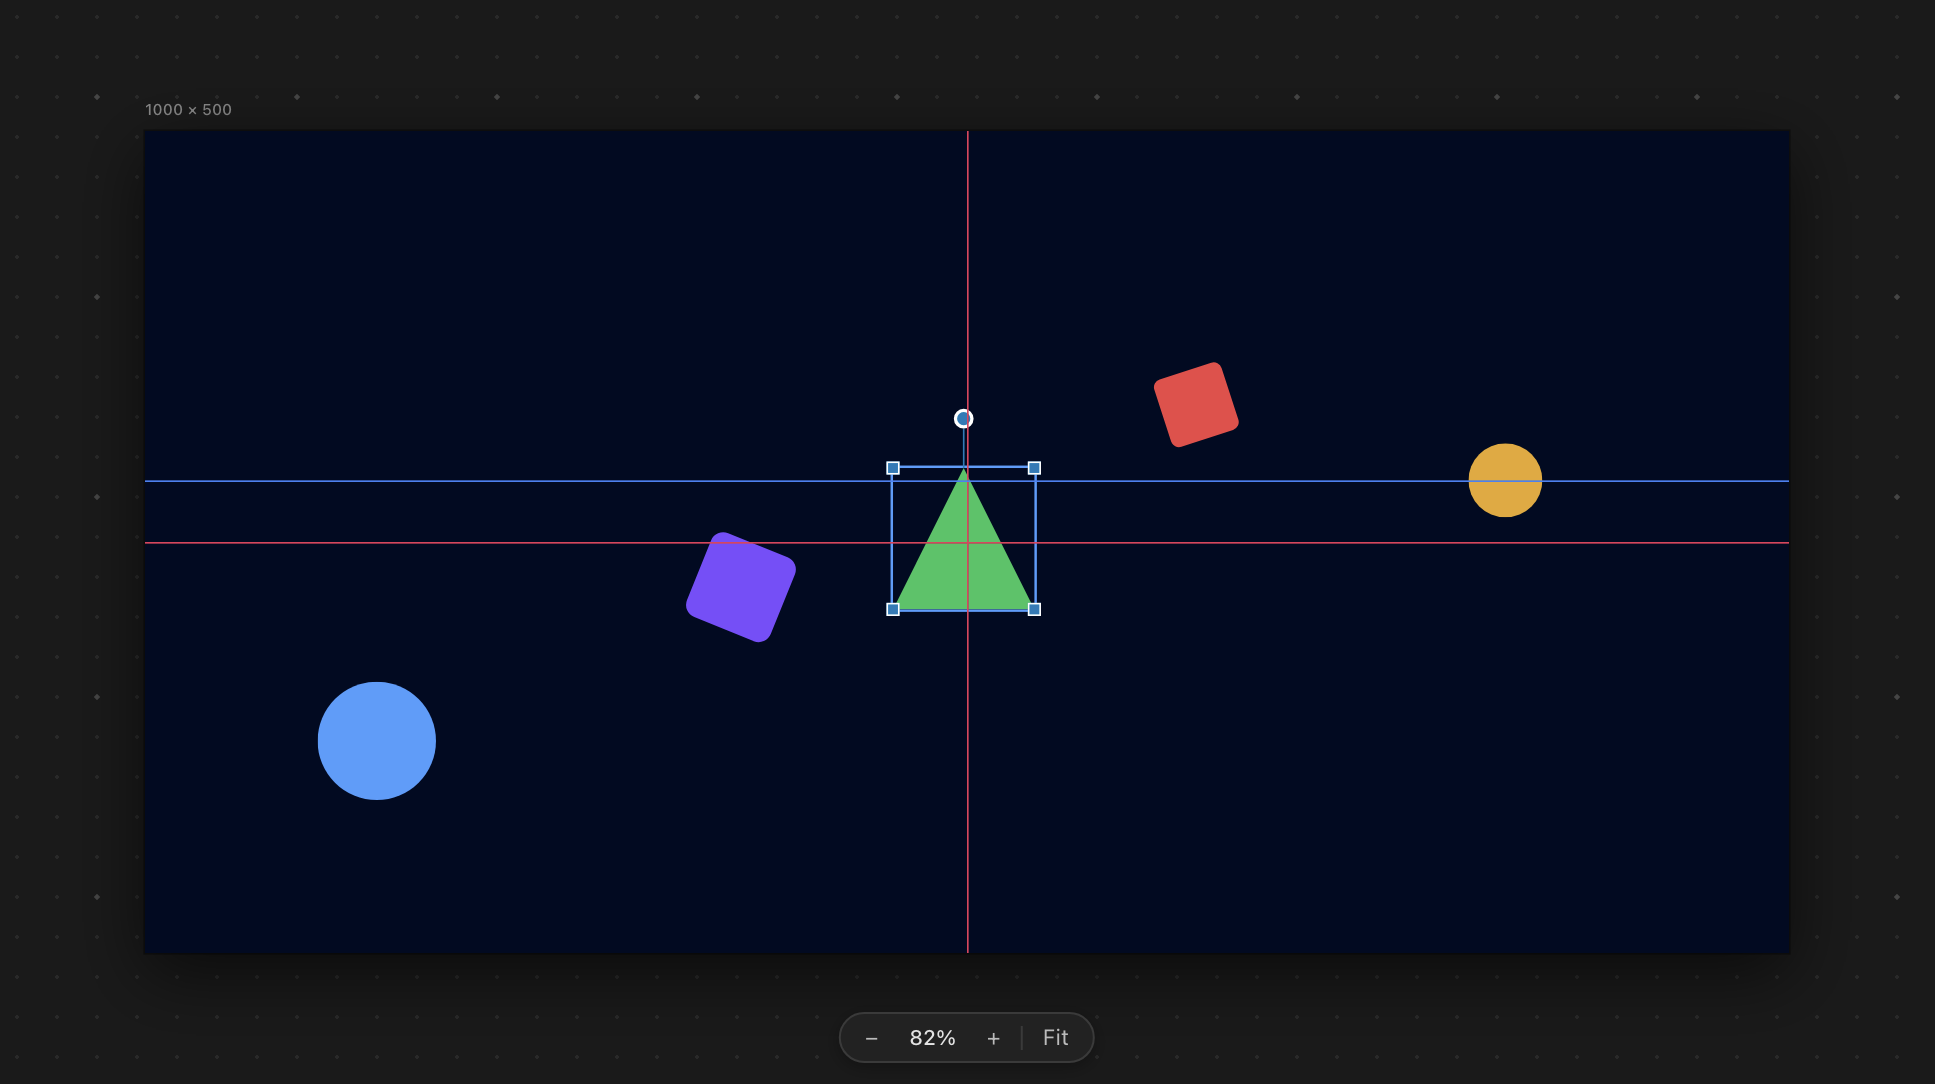
Selected object showing resize handles, rotation handle (top), and smart alignment guides.
The canvas is where you build your scene visually.
Selecting objects
Click any object to select it. The right sidebar will populate with that object’s properties. Click an empty area of the canvas to deselect.
You can select multiple objects by holding Shift while clicking, or by drag-selecting an area of the canvas.
Moving objects
Click and drag any object to reposition it. Smart alignment guides appear automatically as you drag, snapping to the centers and edges of other objects.
Resizing and rotating
When an object is selected, handles appear around its edges:
- Corner and side handles resize the object. Hold
Shiftwhile dragging to maintain proportions. - Top rotation handle rotates the object around its center.
You can also resize and rotate precisely using the Transform section in the right sidebar.
Smart guides
When dragging or resizing, Physicks automatically displays alignment guides relative to other objects in the canvas. This helps you create visually balanced compositions without manual measurement.
Object properties — Right sidebar
When an object is selected, the right sidebar displays expandable sections containing all its properties.
Shape
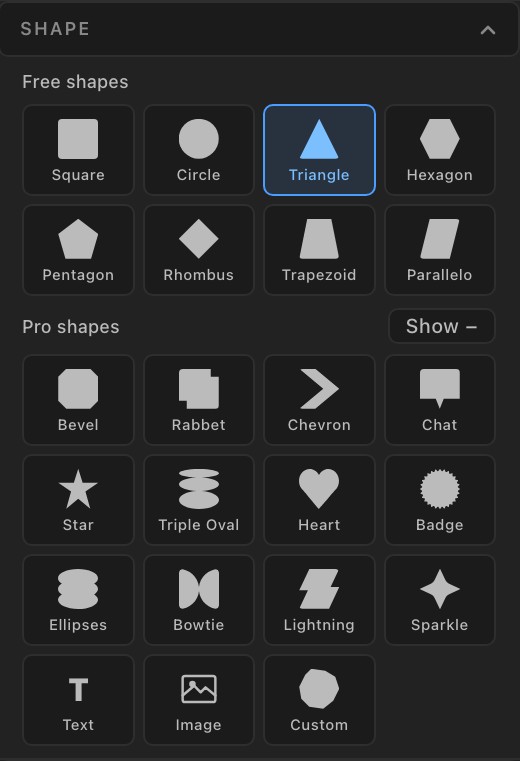
Right sidebar: Shape section
Choose from 23 built-in shapes, organized in two groups:
- Free shapes (8): square, circle, triangle, hexagon, pentagon, rhombus, trapezoid, parallelogram.
- Pro shapes (12): bevel, rabbet, chevron, chat bubble, star, triple oval, heart, badge, ellipses, bowtie, lightning, sparkle.
Three additional Pro shape types are also available:
- Image — the object displays an image from your media library.
- Text — a letter or word is used as the silhouette of the object’s shape.
- Custom SVG — upload your own SVG file to use as the shape.
Transform
Right sidebar: Transform section
Numeric controls for size and orientation:
- Width and height, with optional aspect ratio lock.
- X and Y position on the canvas.
- Rotation in degrees.
- Padding (interior spacing), editable per side or unified.
- Border radius (corner rounding), editable per corner or unified.
- Align to canvas — buttons to align the object to the left, right, top, bottom, or center of the canvas.
- Flip — flip the object horizontally or vertically.
Colors
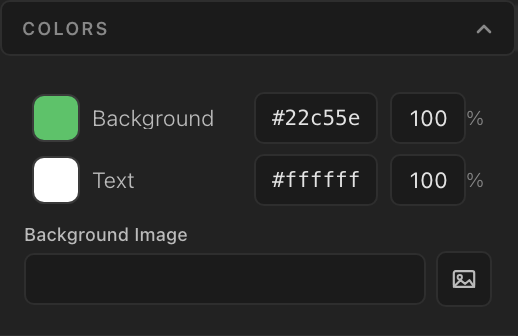
Right sidebar: Colors section
Three independent visual states, each with its own settings:
- Base — the default appearance.
- Hover — appearance when the visitor hovers over the object.
- Active / Selected — appearance when the object is clicked or selected (Pro feature).
For each state, you can configure:
- Background color.
- Text color.
- Background image (selected from the WordPress media library).
- Opacity.
Border
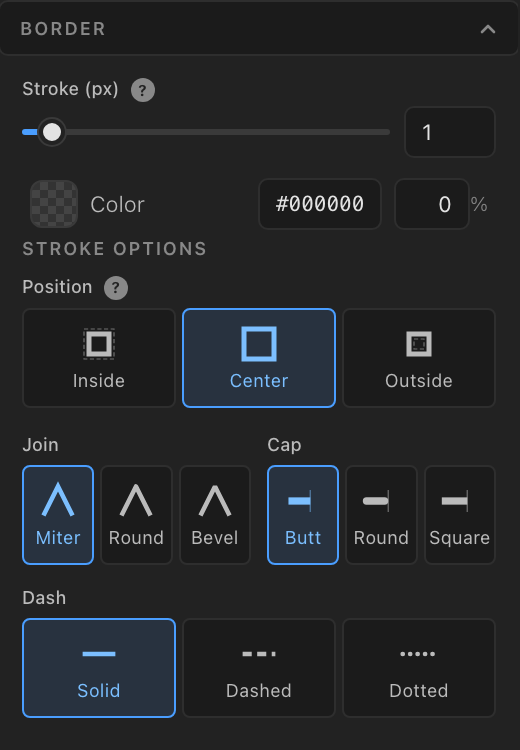
Right sidebar: Border section
Stroke configuration:
- Border thickness in pixels.
- Border color (and hover color).
- Stroke options subpanel for advanced styling: stroke position (inside, centered, outside), line join (miter, round, bevel), line cap (butt, round, square), and dash style (solid, dashed, dotted) with size and gap.
Content
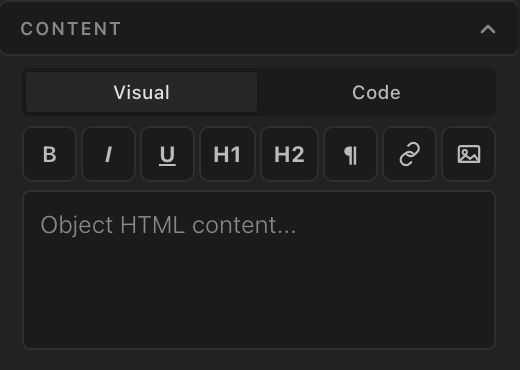
Right sidebar: Content section
A rich text editor where you can add HTML content inside the object. Supports both visual and code modes for full flexibility.
Action
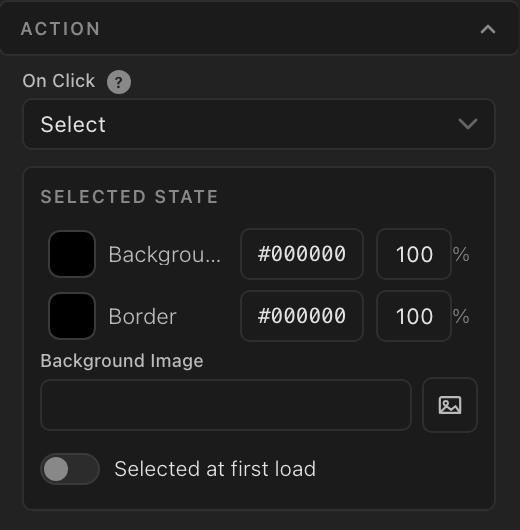
Right sidebar: Action section
Defines what happens when a visitor clicks the object:
- None — no action.
- Open link — opens a URL in the same tab.
- Open link in new tab — opens a URL in a new tab.
- Select / Toggle — switches the object to its selected state, useful for interactive UI elements (Pro feature).
Advanced
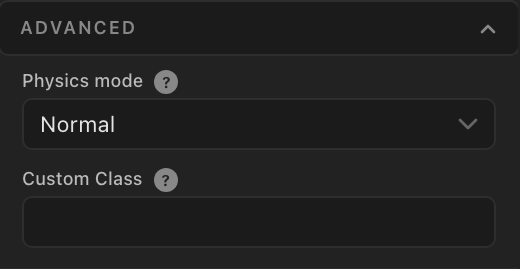
Right sidebar: Advanced section
- Physics mode — controls how the object participates in the physics simulation. The Free version uses normal mode. Physicks Pro adds fixed (static obstacle), ghost (visual only, no collisions), and follow mouse (the object tracks the cursor).
- Custom CSS class — add a CSS class to the object’s HTML element for custom styling from your theme.
Objects with fixed physics mode
Objects with ghost physics mode
Objects with attraction physics mode
Objects with toggle effect
Composition settings — Bottom panel
The bottom panel applies to the entire composition, not individual objects. It’s organized into three groups.
Canvas
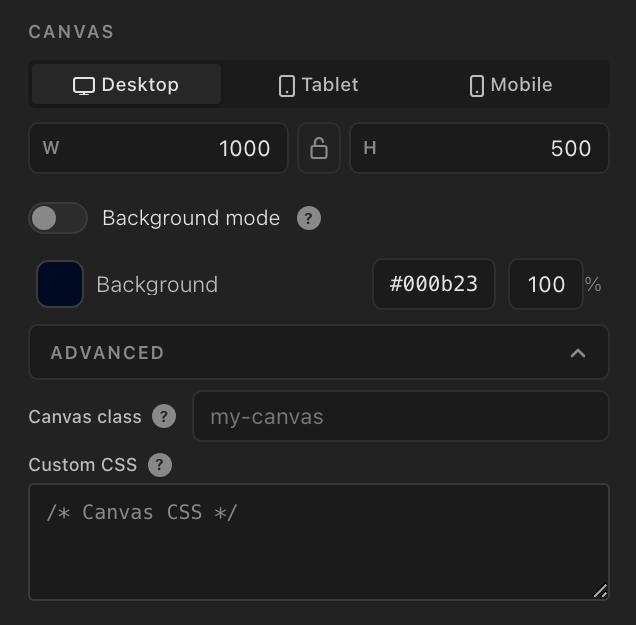
Bottom panel: Canvas section
- Dimensions for desktop, tablet, and mobile, each with its own breakpoint.
- Background color of the canvas.
- Background mode for using the composition as a section background in page builders.
- Custom CSS class for the canvas element.
- Custom CSS with a syntax-highlighted code editor.
Interaction
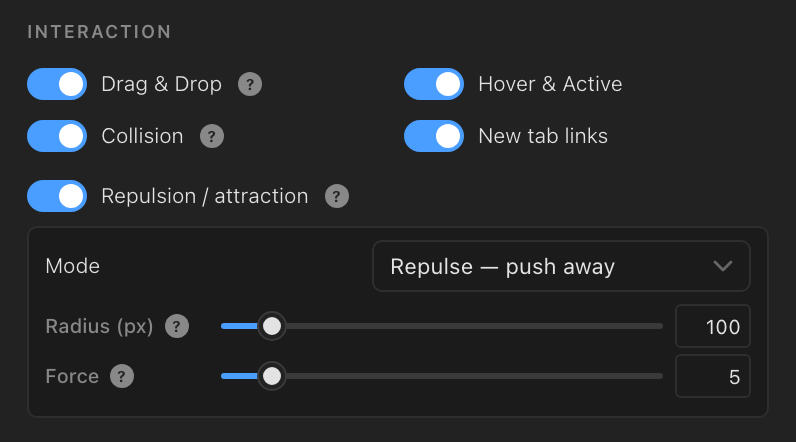
Bottom panel: Interaction section
Behaviors that apply globally to all objects:
- Drag and drop — enable or disable visitor interaction.
- Object collisions (Pro) — turn collisions between objects on or off.
- Cursor repulsion / attraction (Pro) — make objects react to the visitor’s mouse, with configurable radius, force, and mode (push or pull).
- Hover and active animations — global toggle for hover effects.
- Lock within bounds — keep all objects inside the canvas borders.
- Open links in new tab — global default for object link actions.
- Floating motion — gentle drift of all objects. The Free version offers an on/off toggle. Physicks Pro adds speed, change rate, and static position controls.
Drag & drop objects
Collision between objects
Mouse repulsion
Mouse attraction
Floating motion
Floating motion with static position
Motion & Physics
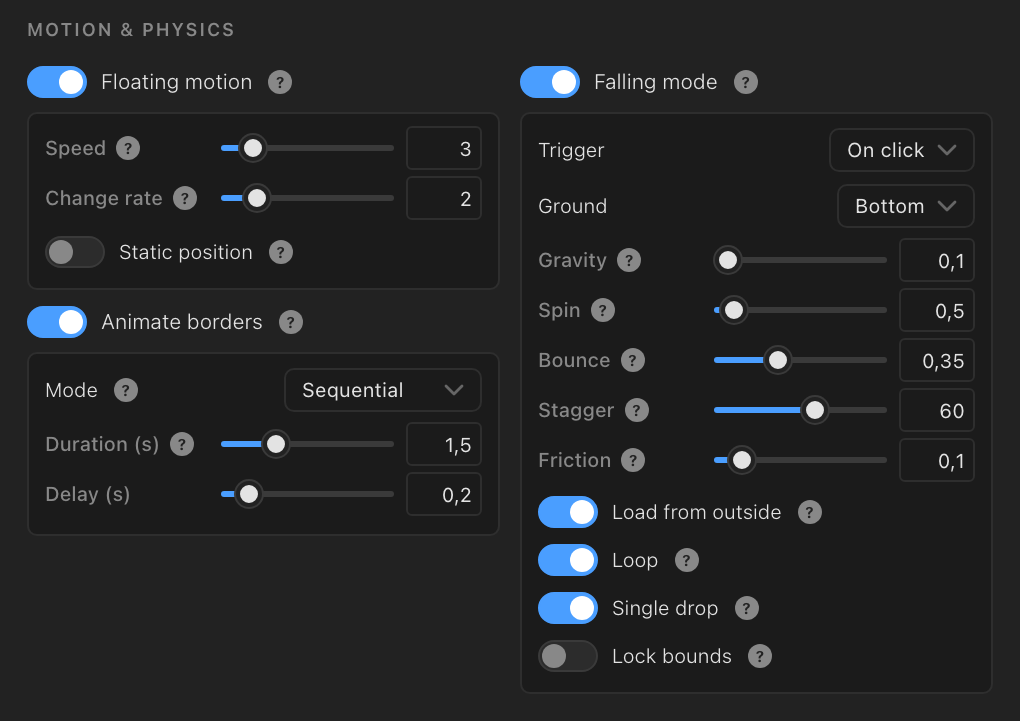
Bottom panel: Motion & Physics section
Physics-related settings that define how the entire scene behaves:
- Border animation (Pro) — animate the strokes of all objects with rotating dashes (duration, mode: simultaneous or sequential).
- Falling mode — the most complex behavior. Configures how objects enter and move. The Free version provides an on/off toggle with sensible defaults. Physicks Pro unlocks full configuration:
- Trigger (Pro): on page load or on click.
- Gravity, bounce, friction (Pro) — the core physical properties.
- Spin (Pro) — random rotation during falling.
- Stagger (Pro) — random delay between objects so they don’t all fall together.
- Ground direction (Pro) — the direction of “down” (down, up, left, right).
- Loop (Pro) — objects reappear after leaving the canvas.
- Single drop (Pro) — each object falls only once in click mode.
Falling mode
Falling mode on click
Falling mode on click (single drop)
Falling mode on top ground
Falling mode on left ground
Falling mode on right ground
Falling loading from outside
Falling mode on loop
Keyboard shortcuts
| Shortcut | Action |
|---|---|
Cmd/Ctrl + Z |
Undo |
Cmd/Ctrl + Shift + Z |
Redo |
Cmd/Ctrl + S |
Save |
Delete / Backspace |
Delete selected object(s) |
Cmd/Ctrl + D |
Duplicate selected object(s) |
Shift + click |
Add object to selection |
Esc |
Deselect all |
Tips
- Use Play often. Static design rarely predicts how physics will look. Click Play frequently while building to see what’s actually happening.
- Set object defaults. If you’re creating many similar objects, configure their default properties in Physicks → Settings → Default Settings → Object so you don’t repeat yourself.
- Start with a template. Even if your end goal is custom, starting from a template gives you a working physics setup you can deconstruct.
- Use Tablet and Mobile views early. Switching breakpoints late in the process means redoing layout decisions. Build with all three in mind from the start.